Configure Maturity Assessment Settings
The Calibo Accelerate platform provides you with a powerful mechanism to assess the maturity levels of your organization, your products, and teams. To initiate and conduct these assessments, you must first configure the maturity assessment settings. In this topic, let us understand how to set up and customize your assessments.
As an administrator of the Calibo Accelerate platform, follow these steps to configure the maturity assessment settings:
- Sign in to the Calibo Accelerate platform and click Configuration in the left navigation pane.
- On the Platform Setup screen, on the Maturity Assessment tile, click Manage.
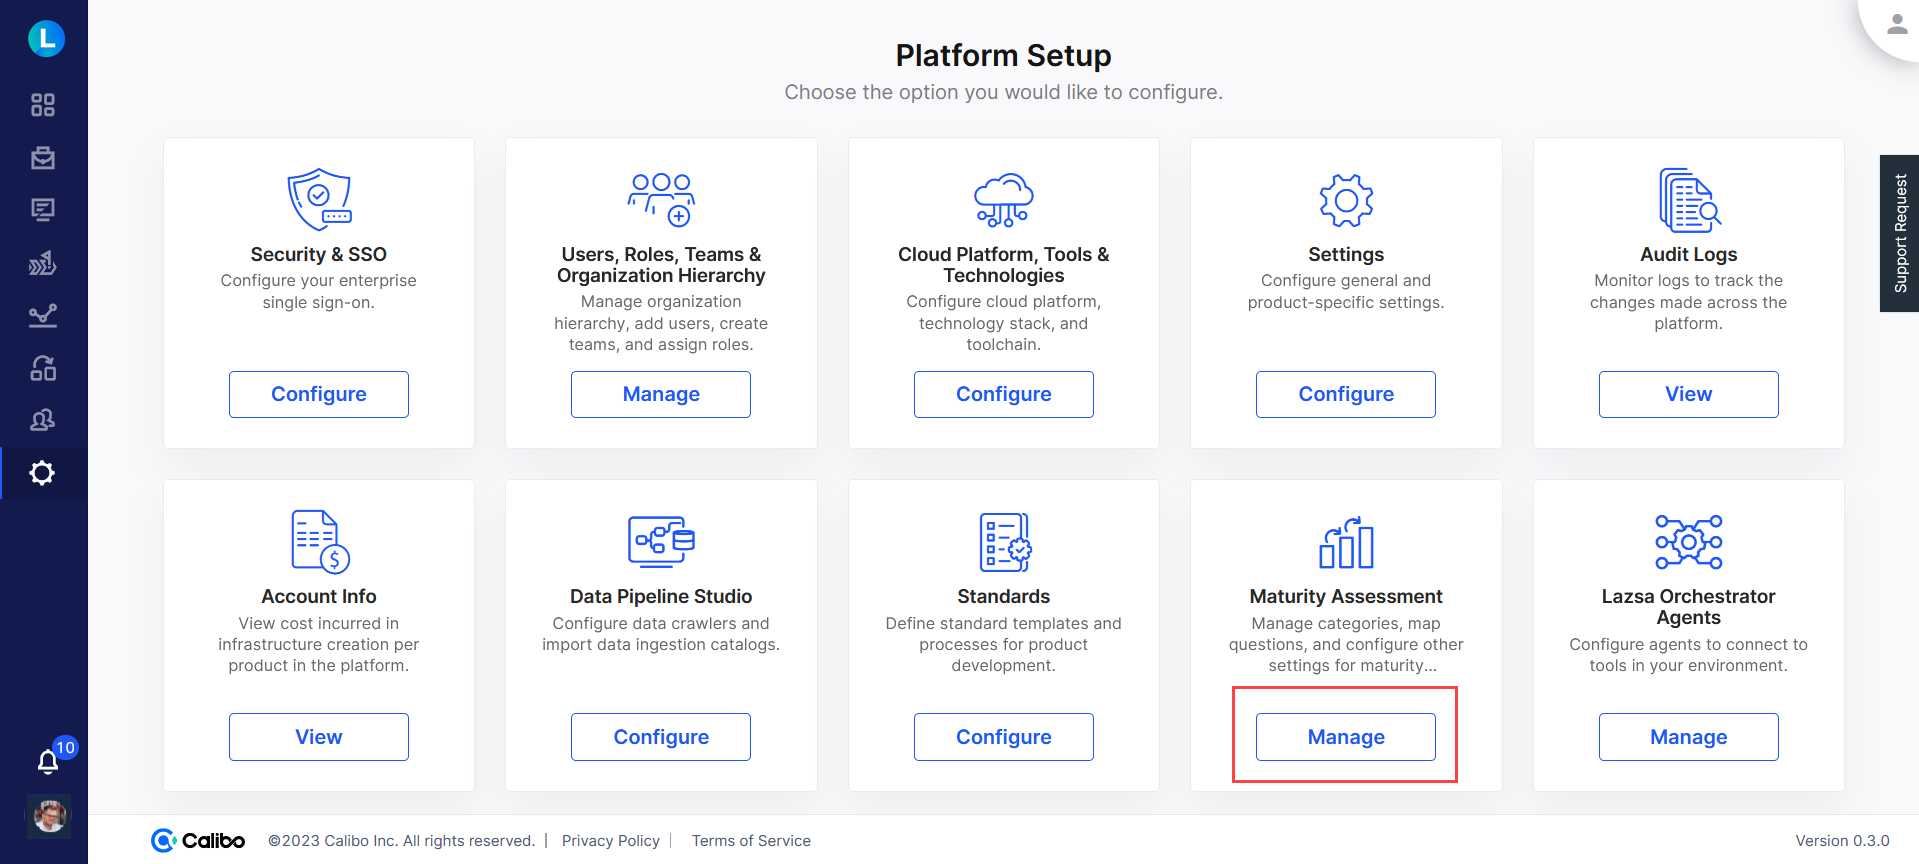
- On the Maturity Assessment screen, do the following on each tab:
 Categories
On this tab, you can manage categories and sub-categories to define the scope of your assessments. The Calibo Accelerate platform offers the following sections for maturity assessment:
Organization
Product
Team
Each section is pre-configured with default categories and is further subdivided into multiple subcategories, which serve as various knowledge areas catering to a wide range of assessment needs. These subcategories contain questions that are used to evaluate the maturity assessment across your organization, products, and teams. You can customize these default categories and subcategories, create new categories and subcategories, and manage the questions within them, aligning the assessment process with your specific requirements.
Add Category or Subcategory
You can create new categories and subcategories in addition to the default ones as per your assessment requirements.
To add a new category, in the desired section, click
 , enter the name of the category, and click Add.
To add a new subcategory, in the desired category, click
 , enter the name of the subcategory, and click Add.
Rename Category or Subcategory
You may want to rename a category or a subcategory as per your naming convention and to suit your unique assessment criteria.
To rename a category, click the edit icon
 next to the category name, edit or replace the name with a new one, and click Save.
To rename a subcategory, click the
 icon next to the subcategory name, edit or replace the name with a new one, and click Save.
Delete Category or Subcategory
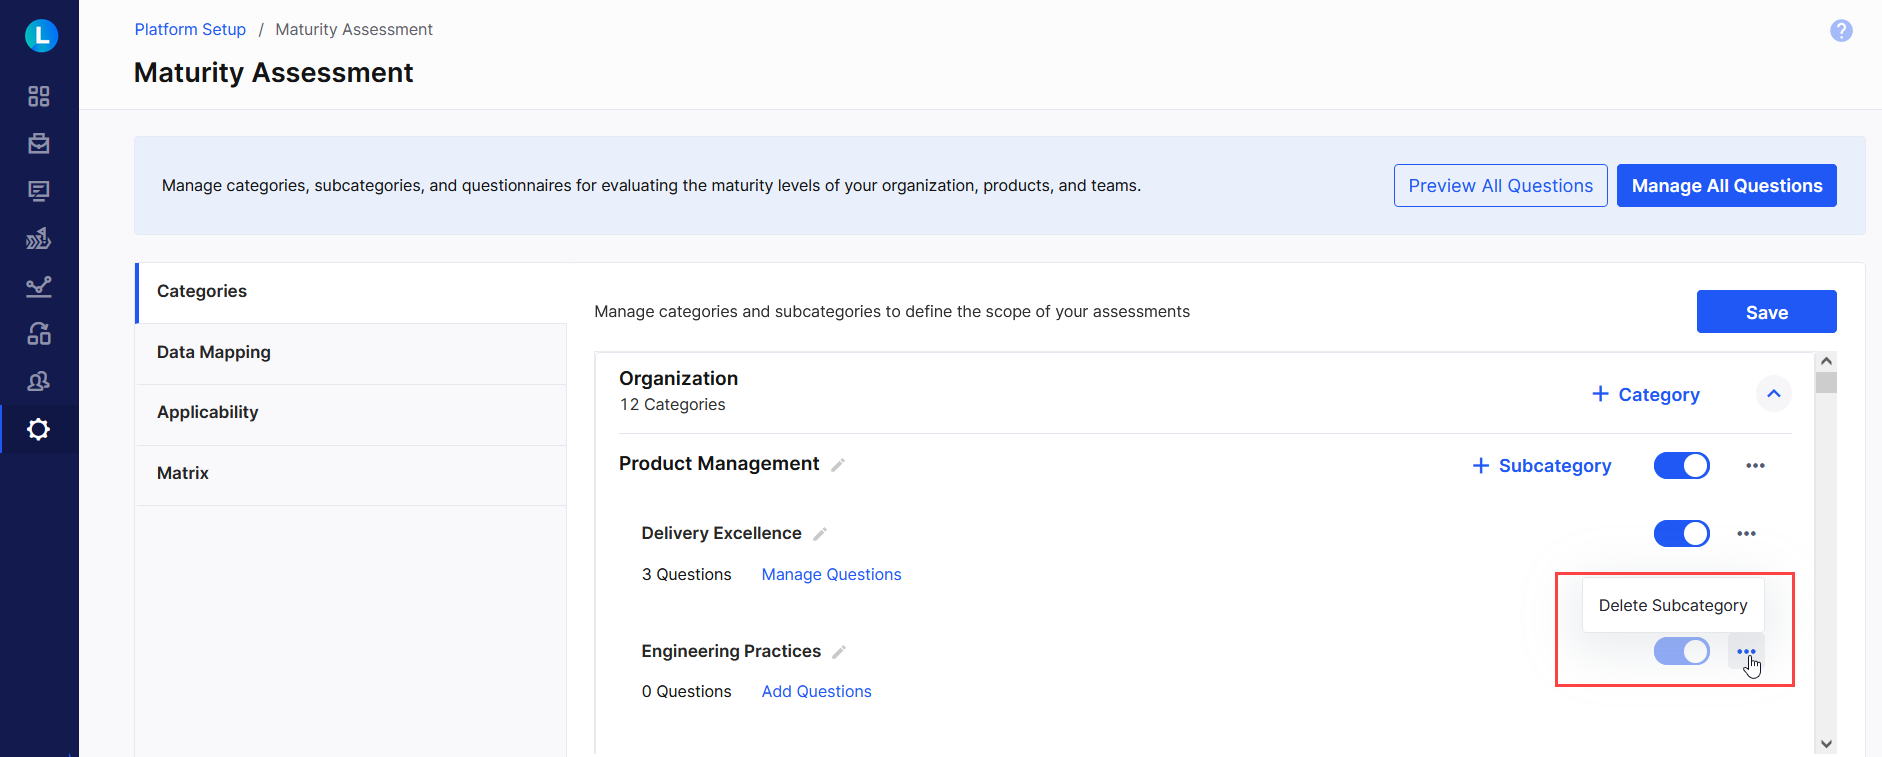
To delete a category, you must delete all its subcategories first. Similarly, to delete a subcategory, you must delete all the questions within that subcategory.
To delete a category, click the ellipsis (...) in the extreme right of the category name, and then click Delete Category.

To delete a subcategory, click the ellipsis (...) in the extreme right of the subcategory name, and then click Delete Subcategory.
Manage Questions
Subcategories within the assessment categories contain questions related to a specific knowledge area. These questions are used to evaluate the maturity assessment across your organization, products, and teams. You can add new questions, edit, or delete the existing ones, and manage them for maturity assessment.
Add New Question
In the subcategory where you want to add a new question, click Add Questions.
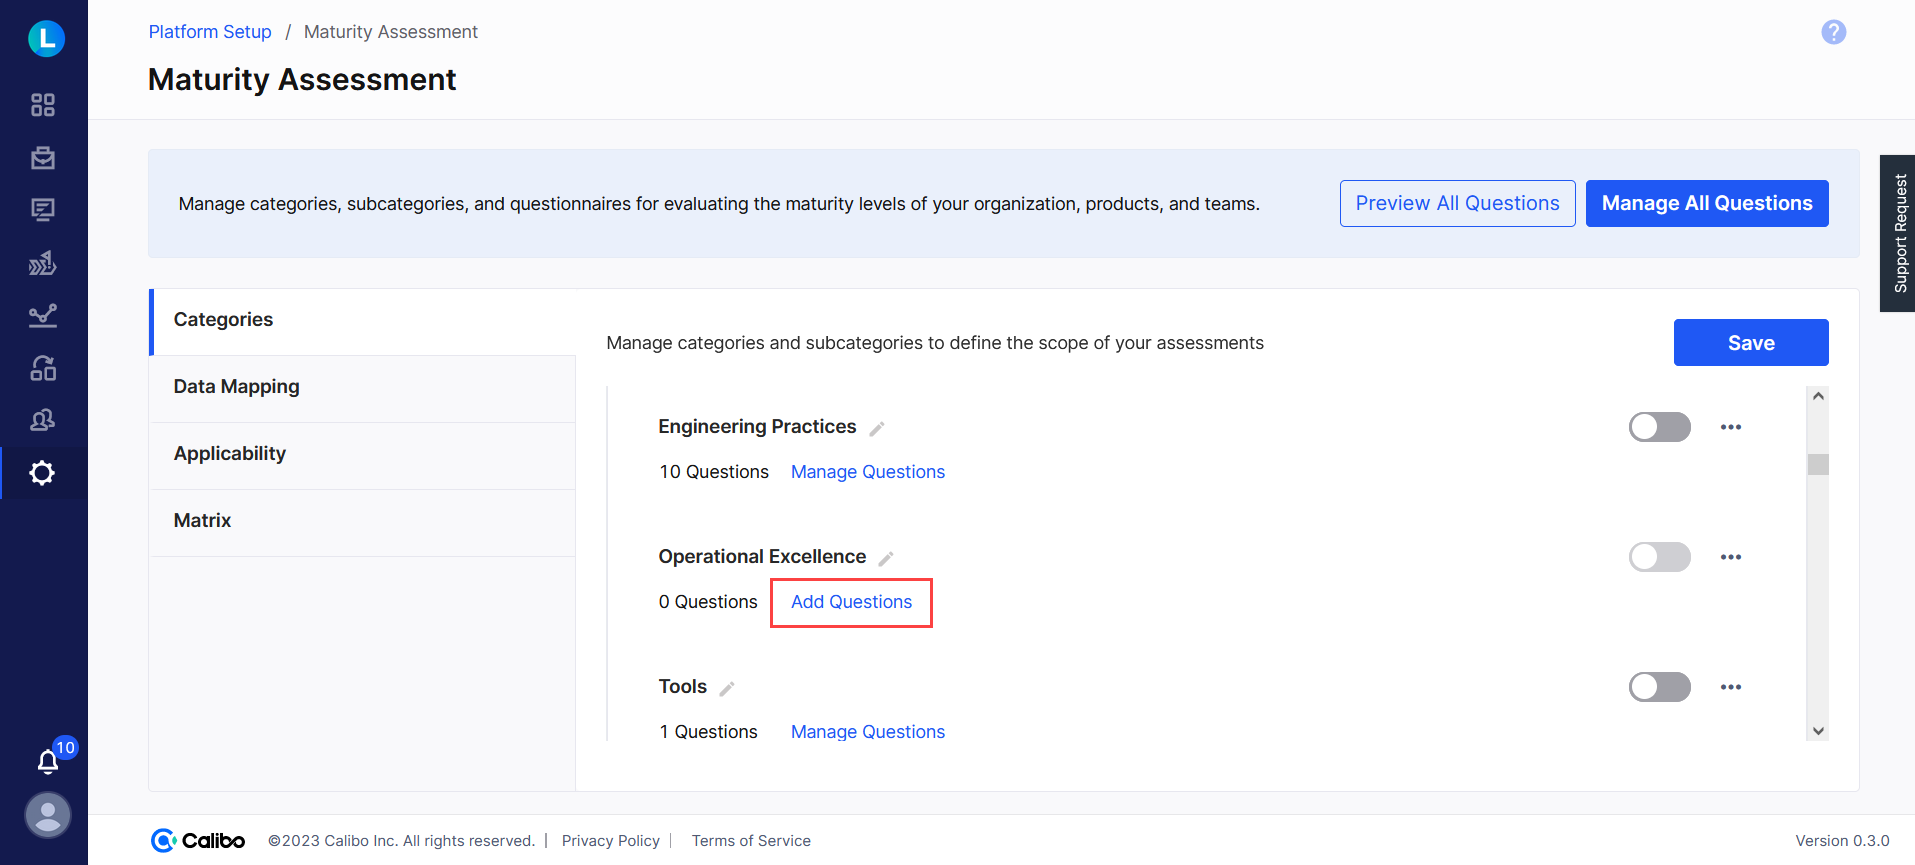 If the category already contains questions, you see the Manage Questions link instead.
On the screen dedicated to the question management for the selected subcategory, click +New Questions, and then from the dropdown list, do one of the following:
Import from Excel File: If you already have a questionnaire in an Excel sheet saved locally on your computer, select this option. In the Import Questionnaire side drawer, drop the questionnaire file in the drop zone or browse your computer and upload the file.
The questionnaire must be created by using the assessment questionnaire template provided below the drop zone. Download the questionnaire template, add all the details related to questions in the template. These details include
After you upload the Excel file, your assessment questions are automatically added to the corresponding category or subcategory.
Add Manually: Alternatively, you can add questions manually. In the Add Question side drawer, do the following:
Question Type: In the dropdown list, choose the type of the question you want to add. It can be a single choice question, multi choice question, or True/False question.
Level: Assign a difficulty level (1, 2, 3, or 4) to the question.
Mandatory: Select this box to make a response to this question mandatory. Respondents cannot proceed without answering mandatory questions.
Question: Enter the question text.
Options: Click +Add Option. Define the options that you want to make available for selection to a respondent and specify the score associated with each option. Click Add Option. The option is listed in the Options section. To edit or remove the added option, click the ellipsis (...) in the option row.
You must add a minimum of 2 options and can add up to 5 options.
After you configure these fields, click Add. The question is added to the selected subcategory.
In the list of questions, you see the question text along with other details such as the type of the question, whether it is system-defined or user-defined, name of the user who added it, and the time stamp when the question was added.
To include the question in the assessment questionnaire, turn on the toggle switch in the question row. Turn it off to exclude it from the assessment.

Edit Question
To edit a question, click the ellipsis (...) in the extreme right in the question row, click Edit, make the desired changes, and save them.

To delete one or more questions, click the box to the left of the question, and then in the lower left corner, click Delete Selected, and confirm deletion.
To delete all the questions on one page, click the initial box to the left of the Questions column header. This selects all the messages on that page. Click Delete Selected, and confirm deletion.
Delete Question
You can delete questions that are no longer required. You can delete a single question or multiple questions from the list in a specific subcategory or in the consolidated view on the Questionnaire Management screen.
 Data Mapping
Associate system-driven data with maturity assessment questionnaire. The responses to the questions are fetched directly from the system.
 Applicability
Enable or disable the toggle to decide whether a maturity assessment should be applicable at a product level or feature level.
 Matrix
Click +New Maturity Level to define your desired maturity levels and their corresponding score ranges. Maturity levels represent various stages of development or achievement in a particular area. For example, to assess the market-readiness of your product, you may want to define levels like 'MVP' with a score range of 0-1, 'POV' with a score range of 1-2, 'Industry' with a score range of 2-3, 'Market-ready' with a score range of 3-4, and 'Industrialization' with a score range of 4-5. The maximum score limit is set to 5. The scores obtained from assessment responses determine the defined maturity level.
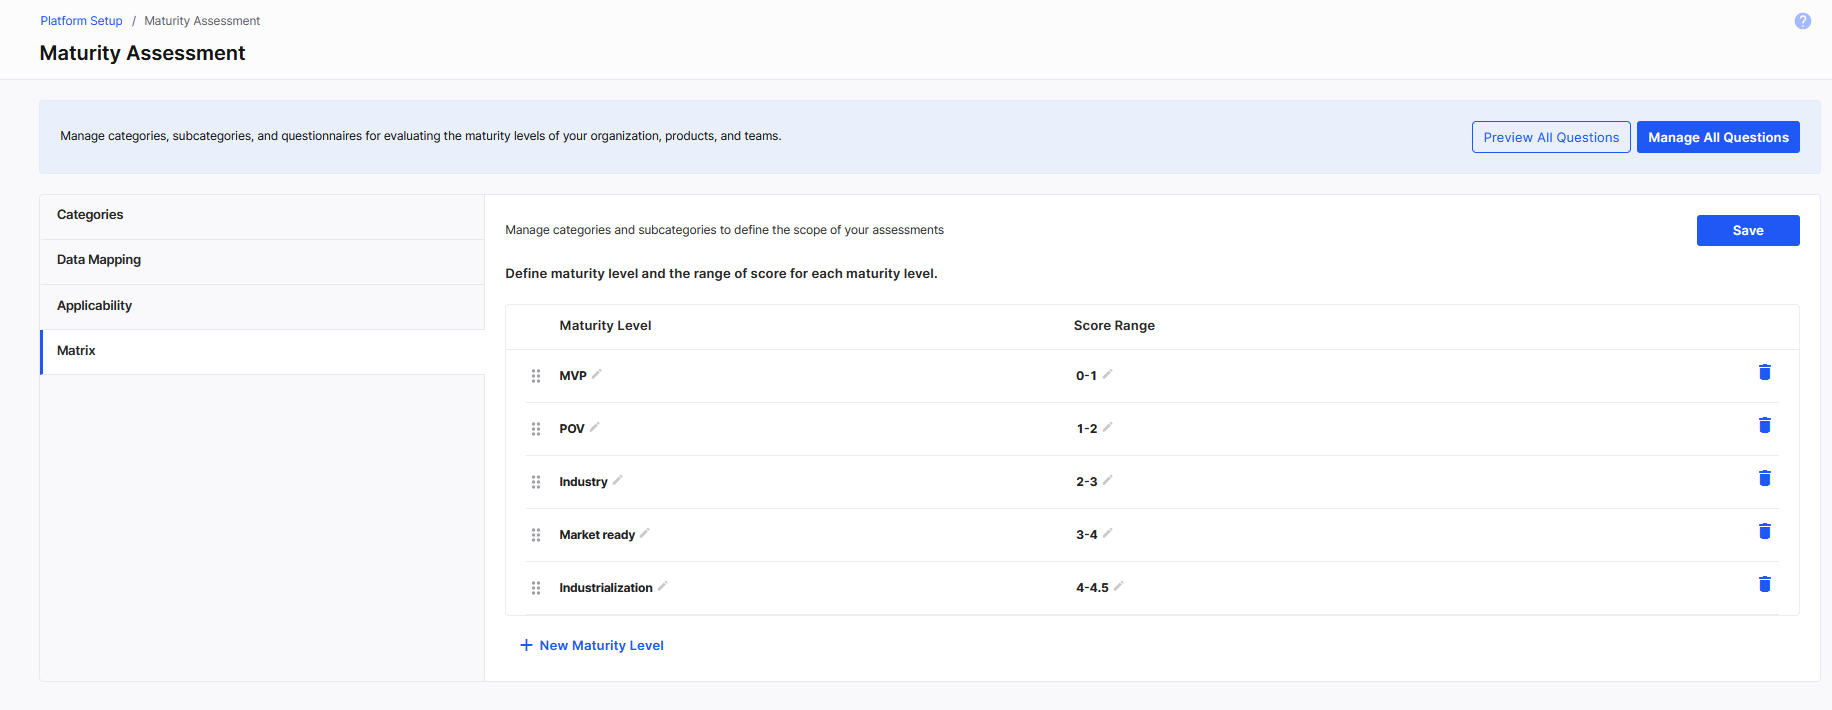
To change the sequence of your defined maturity levels, move them using the drag handle
 .
. To edit the existing labels of the maturity levels, click the edit icon
 beside a maturity level, change the value, and click
  to save your change.
To edit the existing score range for a maturity level, click the edit icon
 beside a score range, move the slider to change the range values, click
  to save your change.
You can delete the maturity levels that are no longer required.
Preview All Questions
Before you initiate maturity assessment, you may want to preview the questions and the options that you have configured. To preview your configured questions, click Preview All Questions.

Previewing questions helps you identify any errors or inconsistencies in the questions or options that might have been missed during the configuration process.
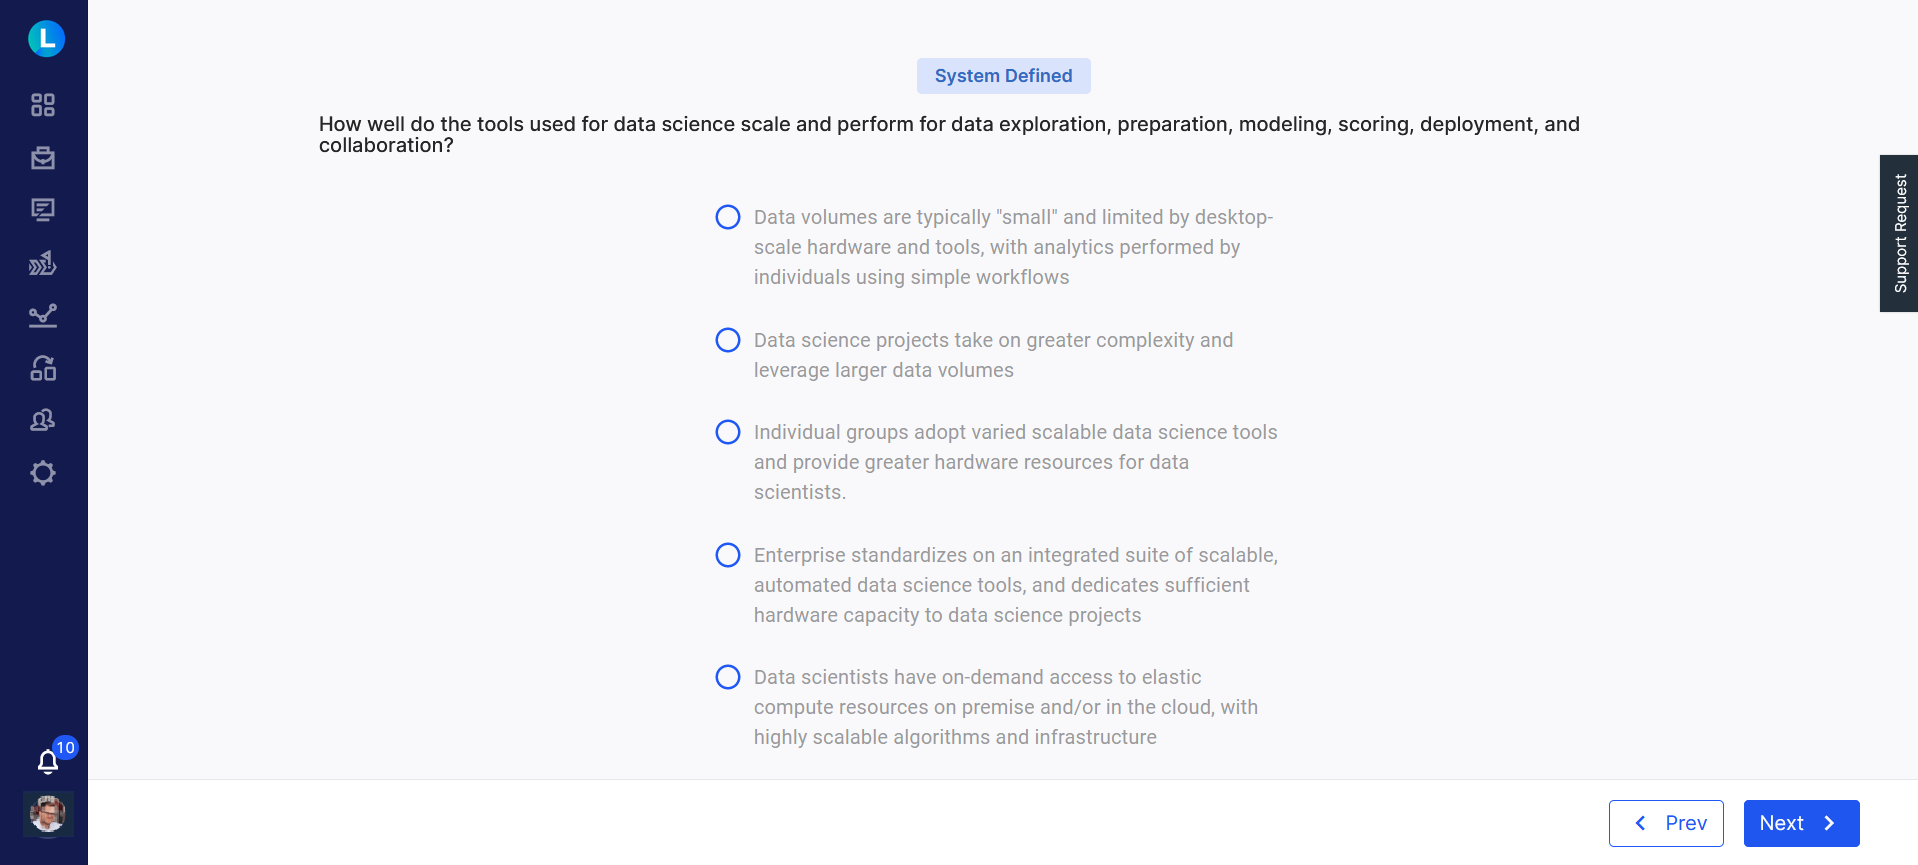
You can always go back to the respective questions and modify them as required. This helps in maintaining the quality and accuracy of the assessment questionnaire.
Manage All Questions
For a consolidated view of the assessment questions configured for various categories and subcategories, click Manage All Questions.
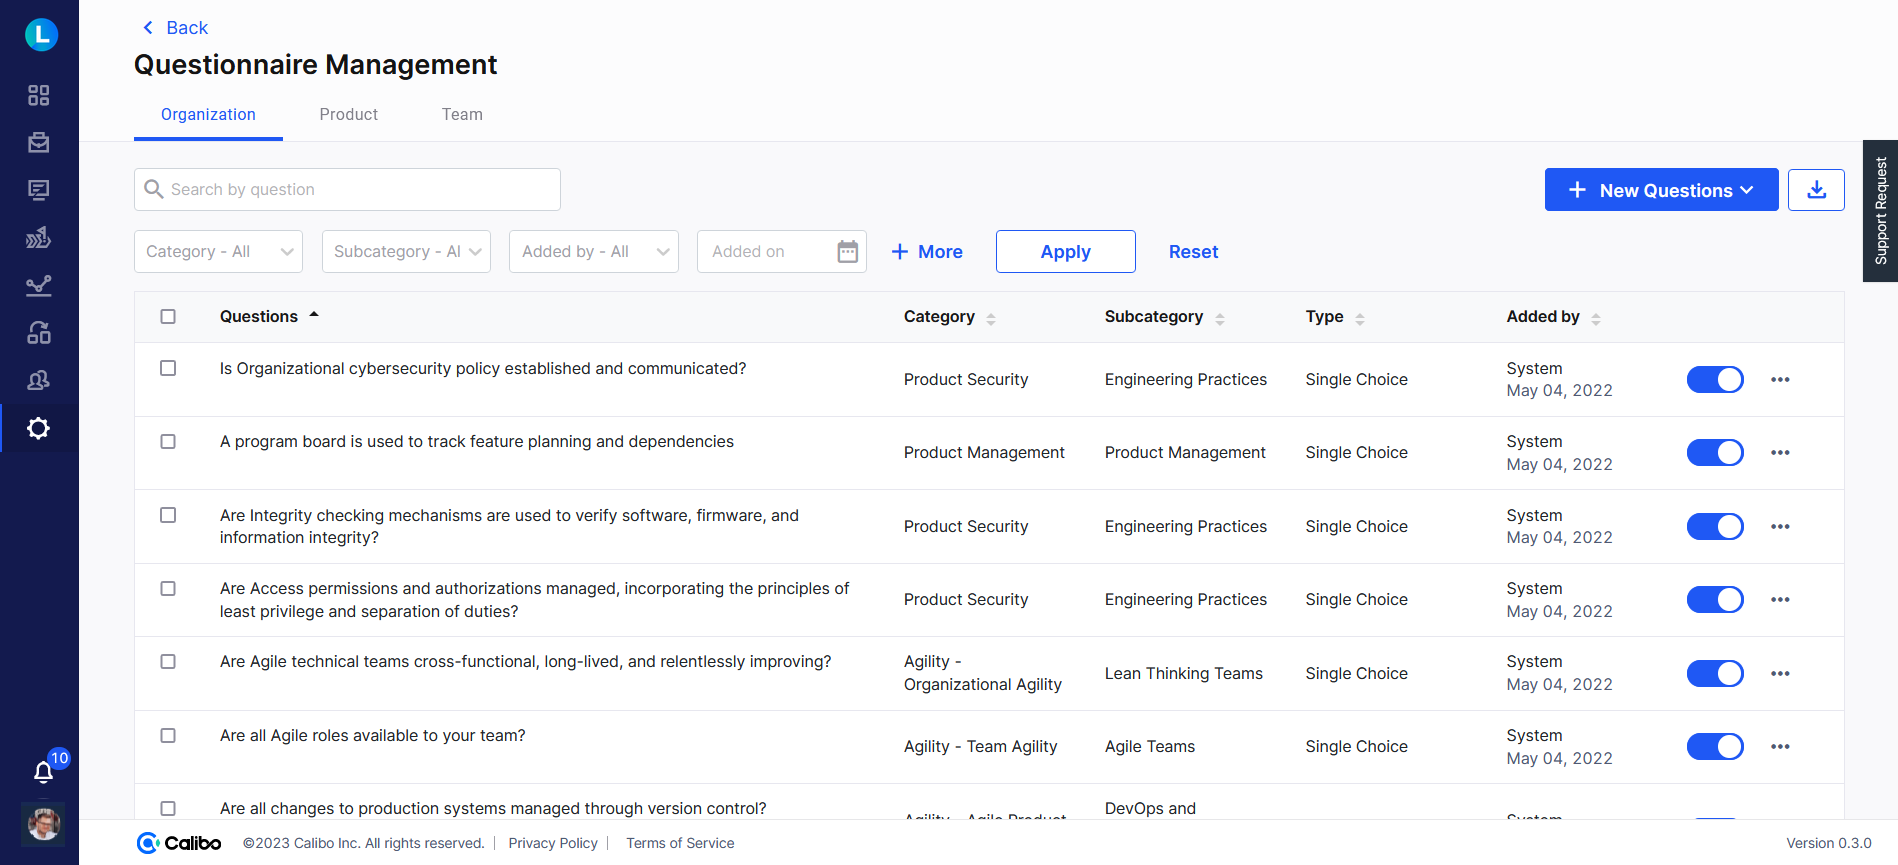
On the Questionnaire Management screen, all your configured questions are categorized under Organization, Product, and Team tabs. This consolidated view provides essential details like question type, category, subcategory, creator (System or user), and timestamp.
You can search for specific questions by typing the question text in the search bar. To narrow down your search, you can apply filters based on category, subcategory, creator, timestamp, or question type. You can turn on or turn off the toggle switch for a question to include it in or exclude it from the questionnaire. You can click the ellipsis in the extreme right in the question row and edit any question as required. Thus, Questionnaire Management simplifies the process of managing and organizing your assessment questions effectively.
Thus, by configuring your Maturity Assessment settings as discussed in this topic, you are ready to initiate assessments and gain insights into the maturity levels of your organization, products, and teams.
| What's next? Add or Create Questionnaire Using Templates |